New Made on Monday Pieces

After a long break I have made some more pieces for the Made on Monday Challenge.  I am not anywhere close to doing one per week which is what I tried to do for the first year, but I will participate as much as I can.  My plan is to develop some of these pieces into larger works, because after all these years, I still don’t know what my ‘style’ is.  Maybe I don’t have one?

It has been a busy year with family commitments as well as work, and I also took a month off to travel with my husband to England and Ireland in May, which was wonderfully relaxing.  I have to say the scenery we experienced, particularly in Northern Ireland was absolutely some of the most amazing I have seen.  I took many photos, and hopefully something will end up in some form of textile pieces in the future.

Meanwhile I have been practicing “drawing” with thread.  Often the inspiration for “what to draw” takes longer than actually stitching!  I am getting better at making quick decisions and getting on with it, but that still needs work.

Here are my 2 favourites from the current Made on Monday batch.  You can see all of them in my gallery.

MoM Lyn Pecchiar #59

This one was stitched first using black thread, then I used watercolour pencils to add the colour.  Even though it’s a bit wonky, I love the sketchiness of it.

MoM Lyn Pecchiar #58

This little bloke was stitched entirely freehand using a variegated thread.  It was interesting to see what colours ended up where, and I love the different coloured eyes.

Hope you have enjoyed seeing what I have been up to.

Until next time

Lyn

Applique and Free Motion Machine Stitching

I think I have found my passion.  A mix of applique followed by free motion machine stitching.  I find the applique process somewhat soothing.  Sitting and planning colours and types of fabric to use and where to place them.

The challenge for 2019 is to do a 5 x 5 inch piece per month to continue the Made on Monday challenge and I am starting with a series of appliqued pieces with a scenic theme.

The first piece is “Italy 1” and I have sketched a couple of options based on the same theme inspired by a photo from a friend.  The following is my sketch for the first piece for 2019.

20190120_111836

I then re sketched onto a cotton fabric that I painted last year.  The blues were perfect for the ocean background.

20190120_111848

The sketched/painted piece was then sandwiched with wadding and a cotton background before I commenced stitching the ocean. I wasn’t happy with the alignment of the balconies, but I can fix that when I applique the bits on.

20190130_094653

A little extra stitching with a very pale blue added the shimmer I was wanting.

20190130_100155

Now for the applique.  This is my favourite bit.  I have a stash of coloured bits of fabric from other projects that are already fused with vlisofix.  This makes the fabric easier to cut when it has the paper backing still attached.  Once I’m happy with the positioning, I remove the paper and iron the fabric onto the background.

20190130_101413

Once the bits are in place, I used a permanent marker to create further definition and placements for some of the stitching.

20190130_110327

The applique gives definition and colour depending on what you want as a final result.  Using the same colouring also minimises the machine stitching required.  I am now ready to pick my thread colours and stitch.

20190213_120017

I wanted to do more highlight pink stitching to the flowers at the forefront, but the stitching was too think and decided to leave it with just a few.

MoM20190154

I also like to take a photo of the back of the work which always amazes me as to how great it looks.  This one was no exception.

20190213_143647

I’ve already sketched the second version of the same scene, but more about that next time.


Bags! – The Last 6 Months – Part 4 of 4

Early last year I made some bags to give to friends who were visiting from overseas.  I enjoyed the process of working out how to make them and landing on the perfect size and fabric.  I really liked the first one I made, but it was a little to small, so I made a bigger one and used some aboriginal print fabrics that I found in Spotlight.

The 3rd one I made was the one!  I found the perfect fabric at Lincraft and used a heavier weight black cotton duck and my perfect bag was born.  The recipient loved it.

20170301_110719

I have since had a big break from making bags until the last few months where necessity led me in that direction again.  I needed a small cross body bag, big enough to fit my latest phone and keys.  I had one I loved, but my newest phone would not fit.  I used some denim as a base and appliqued some bright hand dyed fabrics using the pre programmed fancy stitches on my trusty Janome.  I’m really pleased with the result and it has served me well so far.

As I continued my quest to clear out some of the kits purchased in the past, I finished the overnight bag kit.  I bought this one because I loved the fabric.  Using 4 colour versions of the same print.  The fabric is an upholstery weight fabric but I still fused wadding to the outer fabric and webbing to the lining.  This gave the bag a nice sturdy weight that allows it to stand and hold its shape.

However, my overnight travels see me taking a lot more stuff than will fit in this beautiful bag.  So my next challenge is to make one that is larger.  I might also experiment with changing the shape slightly at the same time.  But more on that in the future…..

Back to cross shoulder bags…. A larger version of the small one I made was next.  I am still trying to find the perfect size to fit wallet, sunnies, notepad etc…….  I firstly experimented with process to determine where to place the handles and the best position for the outer zippered pockets and options for embellishing the outer.  While I like the first two samples I made, I now know which process to pursue when making future zipper topped cross body bags.  I prefer the option of not catching the top zipper in the side seam as this gives a flatter finish.  I also need to make the lining a lot smaller so it fits better.  Increasing the seam allowance did not seem to be enough for me….

I will continue to experiment to try and find my own simple options for making bags.  I am loving the process, documenting as I go and making lots of mistakes….. Which is fine as I have lots of fabric that I have had in the cupboard for years, so it is nice to be using it at last.  I have now become a sewer of textiles and not just a collector.

A recent trial process was to make a folded bag to minimise seams.  I made quite a few samples experimenting with the use of wadding versus webbing versus nothing if the fabric was thick.  For example “Denim”.

I have not landed on a preferred option for the folded version as yet so I have moved on to another larger bag option…

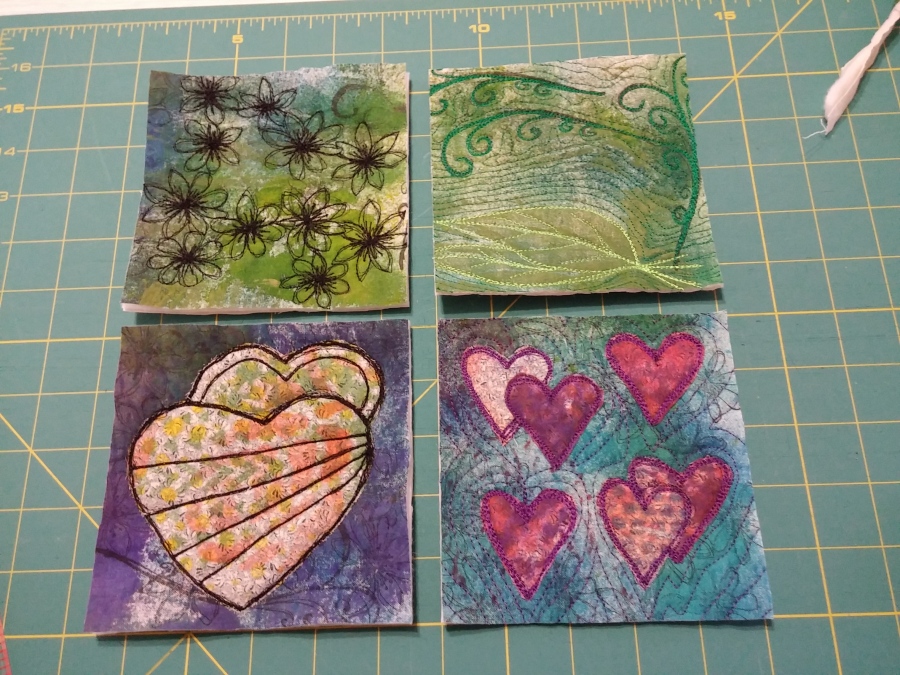
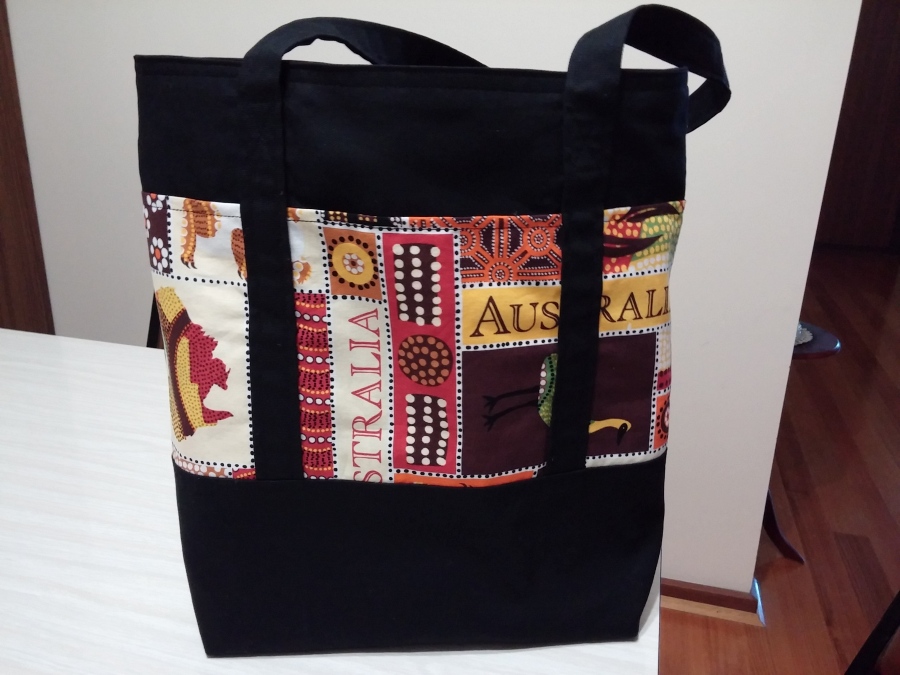
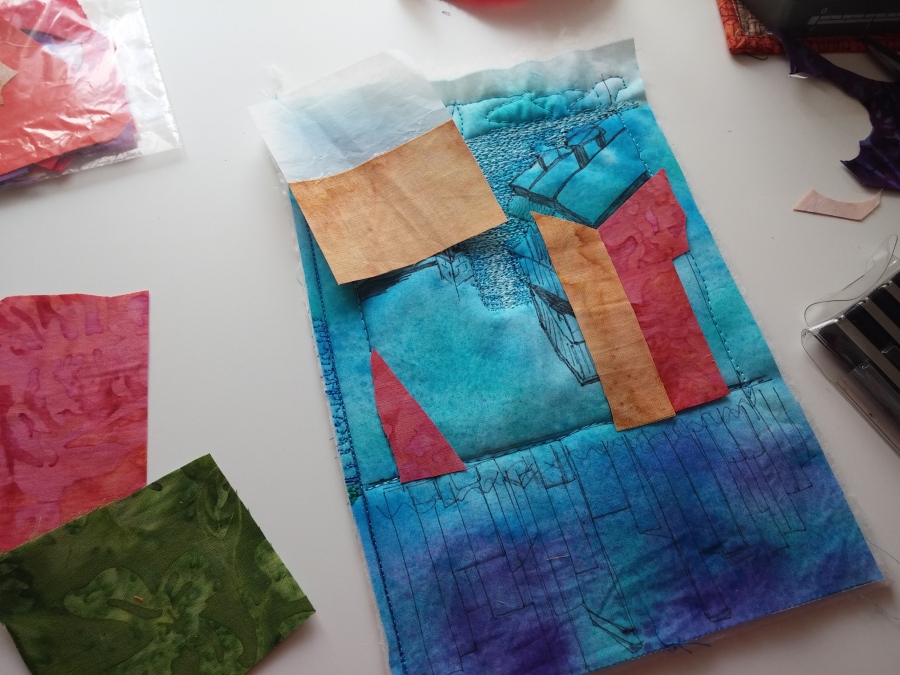
I had quite a few scraps left over from the Dyed and Gone to Heaven Quilt I spoke about in the last post.  The colours would go beautifully with Denim, so thought a larger tote bag would be my next project.  One I could use to carry my stuff in to work.  The dyed pieces with couched threads is quite thin so felt that a thicker denim would give it some body.

I made the base and handles out of denim and pieced the dyed fabric off cuts together for the body of the bag.

I fused a medium weight wadding to the outer bag and a medium weight webbing to the lining.

The bag has one zippered and one open pocket in the lining and a zippered pocket on the front of the bag.

I also decided to add a zippered gusset to the top, rather than leaving it open.  Keep all the goodies inside.

During the process, I found out that my ironing board was covered in synthetic fabric that melts.  Oops! I then got side tracked making a new (Cotton) cover for my mini ironing board.

Once the ironing board cover was made, I finished the bag and am now using it on a daily basis.  It is a bit bigger than I really needed, so am off to draft and make a smaller version next.  The next version is going to use fabric that has either applique or free motion embroidery on it as I want to get back into the free hand work again.   Until next time……..

Sewing Room, Fabric Boxes & UFO’s! The Last 6 Months – Part 3 of 4

Finding myself with more time I have also been doing some spring cleaning.  I cleaned up the spare room, went through my fabric and thread/yarn stash and organised everything neatly, bought a new sewing table and set up my first sewing room/creative space.

I now have my sewing machine and over locker always set up (rather than on the kitchen table), a cutting table and ironing space.  It is incredible how this space has boosted my creativity and output.

Once the drawers were put together, the rest of the table was easy….  Thanks IKEA.

Cleaning up also uncovered quite a few unfinished objects (UFO’s).  This has been my main focus during my leave from work.  Finishing as many UFO’s as possible as well as working through my stash of fabric and yarns.  If I get rid of some, I can buy more……

My stash also contained kits purchased, as well as UFO’s.  The plan was to make up as many of the kits as possible.  I managed to finish a quilt top made from fabrics in a wonderful kit bought from “Dyed and gone to Heaven”.  They sell the most beautiful dyed fabrics and kits.  I couched the fabric using various yarns from my stash before cutting them and arranging as per the instructions.  The quilt top is finished and ready for quilting….

I used up some thick yarn I had in my stash that wasn’t enough to do anything other than a cushion???  I crocheted using the corner to corner pattern found on You Tube by a friend.  It is very easy to do and very therapeutic as it doesn’t require a lot of thinking or counting.   I now have another UFO that needs to be completed once I figure out how to finish it with fabric…..

I love the corner to corner process, so continued on this crochet theme and made a foot stool cover with another lot of thick wool I had in my pile of yarn.  The crochet top was to replace the fabric covered cushion that was well worn.  I “mod podged” the base with fabric ages ago but is still in very good condition.  I am now enjoying the foot stool on a daily basis….

20180710_104608

Having reached the magic 52 weeks of making one 5” square piece every week as part of the Made on Monday Challenge created by Kate Bridger.  We decided to make fabric boxes to store them in……  I got carried away making the panels and ended up making two different sized boxes and have some left over to make another smaller one….

I enjoyed making the boxes and will make more in the future.  For now I am into making bags.

But more on that next time.  Cheers until then…….

Other Sewing Creative Fun! The Last 6 Months – Part 2 of 4

After completing the 52 Made On Monday pieces earlier this year and then finding lots of extra time as I started taking some leave from work, I began, finally, cutting out and making some clothes from the multitude of fabrics I have in my stash.  Whilst I have a cupboard full of cotton fabric for my quilting and textile art endeavours, I also have a cupboard full of fabric for making clothes…….

When I was younger I used to make all my clothes, however, I have since lapsed into only making individual items on rare occasions.  Now that I had more time, I found myself wanting to do something different and hence the clothes making began…..

As I began, I remembered how I hated cutting out……..  It is really hard to sew something without cutting it out!  Hard to believe, when I love cutting up bits of fabric for quilting and textile art.  Cutting fabric with the rotary cutter and ruler for quilting is very therapeutic.  So is cutting out shapes for applique…..

Cutting out clothes patterns (it seems) is very stressful for me.  So I was determined to perfect a few key patterns, re draft them as required, to ensure a perfect fit in order to take all the stress away.

I have perfected a pattern for a simple top, 2 jackets and a slim line pair of ¾ pants.  Perfect as we come into spring……

The first jacket I made was too big in the shoulders.  I amended them using a large fold and making it a feature.  This feature made the shoulder more stable and created a fitted look without the use of shoulder pads.  I have since worn the jacket a couple of times and will continue to wear it through spring as it is very light weight.

The second jacket was tricky as the fabric I used was thick and extremely stretchy, however, some of the mistakes I made ended up being very nice features.  I seem to do that a lot.  A simple pattern ends up taking a lot longer as I try and fix a part that doesn’t fit very well.  The effort was well worth it as I love the fabric and am happy with the finished product.

The front panels were way too big…. Not sure how that happened, I think I was trying to adjust the sleeves based on the first jacket to ensure shoulders weren’t too big….  Back ended up being perfect but not the front.

I fixed it by putting two big tucks across the front panels near the base of the collar – cut off the excess fabric and made it a feature seam…

I also finished the seams of the jacket with a patterned stitch.  The front of the jacket is a little warped due to the patterned stitching causing it to stretch, but I think I kind of like it that way…..

20181012_140620

I certainly learnt that when dealing with extremely stretchy fabric you need to use interfacing if you don’t want it to stretch.  Live and learn!

I used that lesson on the pants I recently made.  I amended an existing pattern in order to make slimmer fitting pants.  I went too far and made them too tight around the calves.  Again, not being one to give up and trash all the hard work…. I undid the side seems.  I hate using the quick unpick or seam ripper, but seem to be using it a lot lately…..

I didn’t want to leave the big gaping side panel as it was, so decided to shorten them further and use some machine embroidery on a panel insert.  Embroidered pants seems to be in at the moment.  I made sure I interfaced the fabric before I used a patterned stitch and am fairly pleased with the result.  I can’t wait for the weather to warm up so I can wear them.

20181010_174757

I made sure I amended the pants pattern slightly before I cut out the second pair from a fabulous fabric I found that has an embossed type pattern on it.

I now have two pairs of ¾ pants I can’t wait to wear…….   Happy Sewing until the next instalment.   Cheers Cora.

MoM Creative Fun! The Last 6 Months – Part 1 of 4

Time flies when you are having fun…. It’s very true.  Over the last 6 months I have been so busy being creative, I forgot to document my achievements.  Lucky I took some photos along the way.  Not as many as I should have.  I always say I am going to take progress photos and only remember when each article is nearly finished.  Oh well!

Lyn and I commenced the Made on Monday challenge in April 2017.  The challenge was to complete a 5” x 5” piece every week for a year.  The challenge has been a fabulous way of expanding my creativity and trying new techniques.  Thanks Kate Bridger for creating the challenge.  I recently finished piece number 53 and I plan to continue contributing to the challenge.  All the pieces can be seen on this site as well as the Made on Monday Site.

Piece number 53 is the result of working with fabric shapes placed on dissolvable fabric and stitched using free motion stitching with my domestic Janome sewing machine.  I used variegated thread on batik cotton fabric on the first sample.


Once finished, I cut it up and mounted onto a quilted backing and edged like a mini quilt.

I almost like the back view better than the front….

I used matching blue rayon thread for the second sample and have since tried using different fabric… really pleased with the brown one… more my colours and the synthetic fabric has a softer drape….  I am doing both colours in pieces with a plan to join them together to make 2 scarves.


…….  It will be a while before I post finished photos as there is a lot of stitching so I am having breaks doing other stuff in between…. More about all the other stuff in the next few posts.   Until then, happy sewing.

Cheers Cora.

Quick update

Hello from sunny Melbourne where the sun is shining, daylight savings started last weekend and things are looking less gloomy!  The year has flown by so quickly and I am long overdue to update the blog.

Not as much sewing has been going on here lately, but I recently purchased a new Pfaff sewing machine so I am keen to give it a good work out.  So far, so good!  I am definitely planning to increase the output in the coming months.  I think it definitely helps to have a goal as well, and lately I haven’t had any deadlines or goals so time just slips away.  Cora and I have talked about how we need to set new goals so that we have something to aim for.

I did manage to make a box for my Made on Monday pieces and I made it large enough to fit in more than the 52 (one year’s work) so I will be keeping that going, just not at the rate of one piece a week.

I have also created pieces 53 and 54 which are now in my gallery.  There were pieces made with soluble stabiliser and free motion machine stitched on my new machine.  I’m pleased to report that the Pfaff passed that test!

So having got my mojo back, there will definitely not be such a long break before the next post!

I know Cora has been stitching more than me, so I will encourage her to update here as well.

Until next time

Lyn

A year of Made on Monday – on Wednesdays!

When I committed to making a piece of textile art once a week for a year this time a year ago, little did I know how challenging it would be. After doing the Made on Monday challenge for 12 months I decided to reflect on my progress and processes so that I can use what I have learned in future pieces of textile art.

MoM Lyn Pecchiar #15

It was challenging in a number of ways:

  • finding time – although the pieces were small I don’t often find time every week to sew,
  • finding inspiration – it’s hard to be creative on demand sometimes,
  • keeping ideas in check – 5 inches square can be fairly limiting
  • trying not to get ahead of myself – thinking this would be great as blah, or I could make 25 of these and make blah etc.,
  • knowing when to stop or when a piece is finished – although this is not a challenge limited to only doing these smaller art pieces,
  • stopping myself thinking ahead about what to do with them all!

MoM Lyn Pecchiar #49

What I learned along the way:

  • why should I make something for anything other than “because”? In other words, it doesn’t have to BE anything,
  • a lot of people think that I should make coasters (!!!)
  • placing limitations on a project when I create something is a good thing because it makes me think more (or sometimes stop overthinking) to solve a problem
  • sewing and textiles IS problem solving
  • I do overthink things a lot – the less I think about some of these pieces the more I like the end result
  • I dream textile creations or solutions a LOT (although I already knew that)
  • It is very beneficial working alongside someone (thanks Cora!) even if we are not always together in the same room – technology is a wonderful creativity tool,
  • Ideas and conversation flow when we can encourage, critique and be inspired by each other’s work,
  • It is easier to recognise your own self doubts when you can call it out in someone else.

MoM Lyn Pecchiar #34

Where will I go now?

  • I plan on making more of these 5×5 inch pieces and adding them to the MoM gallery, perhaps not as frequently
  • I want to use some of the pieces as a stepping stone for some larger pieces
  • I will use some of the techniques I have used in textile art in dressmaking
  • I will try placing limitations or challenge myself to use certain materials, colour schemes, techniques or designs to develop new pieces
  • I recognise that I can recycle and reuse the smallest pieces of my stash to create textile art

I thoroughly recommend the Made on Monday challenge to anyone who want to challenge themselves to extend their creativity.  It has opened my eyes to what I always kind of knew I could do but didn’t want to commit to large pieces to try.  I get an enormous satisfaction out of looking at all 52 pieces in one go.  I have them in a folder currently but have had an idea to make textile boxes to store them in, so we will see how that idea progresses!

All my 52 pieces so far are in my gallery and on the Made on Monday site.

Here are some more of my favourites.

What sort of challenge have you undertaken to extend your creativity?  I’d love to hear about your experiences.

Until next time

Lyn

What’s New in 2018

I can’t believe Easter is over and we are heading towards winter in 2018.  In the meantime, we are having some magnificent autumn weather at the moment.

Where does the time go?  We have been a little quiet on here over the last few months busy with life and trying to catch up with our Made on Monday Challenge which is quickly coming to the final stages.  I have just completed item 45 out of 52 and am working on the next few.

The last 8 that I have completed are some of my favourites.  They are all using fabric that I painted one day when Lyn and I were, once again, experimenting with colours, stamps and stencils.

The pink series are my favourites and I am thinking of either mounting them together or making a cushion.  If I haven’t said it before, I love making cushions, so that will likely be the outcome.  I just need to decide how and whether to include borders around each?  But I’ll leave that decision for another day.

The next lot I did were based on photos, the first two are from the same photo taken on a holiday road trip whilst in Newcastle.  The photo was taken from a fabulous board walk along the coast that we stumbled across.  Why did I do two?  I was trying different techniques.  The first one using paints to highlight the rocks, the 2nd one using fabric.

The final two are based on a photo taken by a friend.  The only real difference is the colour thread I used.


I’m now off to finish the next lot.  Cheers from sunny Melbourne until next time……

Paint, Stencils and Stamps Continued…..

After a slow January, I am trying to get my head back into my creative pursuits.  I thought I would start with a blog listing my last lot of work done prior to Christmas.

I used another piece of painted fabric for more of the MoM Challenge 5 inch pieces.  I deliberately painted the fabric in four sections in order to continue with the Stamp theme.  The piece I used is seen below, top right.

I experimented with different stamps across the piece but found the heavily painted areas made it difficult to see the stamps.  I decided to add appliqué to the heavier stamped half and left the stamped images as background (where visible).

20171206_142928

What have I learnt?  When using the stamps on fabric, keep it simple.  A splash of background colour adds depth to the piece and the use of bold colours for the stitching brings out the shapes.  Too much colour in the background and you lose the effect.  I also love the effect of free motion stitching over the stamp but not having to strictly follow the lines.  I really like the echo effect of the lines where they are not followed exactly.

20171206_142944

20171206_170733

Another 4 finished for the MoM Challenge.

After a long break over the Christmas period I need to gather up my supplies, look for inspiration and have a think about what to try next……..